• Jak prześledzić ścieżkę na płycie bez oznaczeń

Forum rules:Click here to view the forum rules

  1. Topic title should contain the brief description of problem.
  2. Topic message should contain the extended description of problem and, the question.
  3. It is not allowed to post the attachments with complete documentations or BIOS files nor linking to any 3rd party websites hosting such files. It is only allowed to post the small portion of the documentation (up to one page per post).
  4. You can only describe one problem per topic. For each another problem you should open a new topic.
  5. It is strictly forbidden to ask for any kind of documentation or BIOS file. For such requests please use the DOCUMENTATION & BIOS/EFI REQUEST subforum.
This topic is marked as ARCHIVAL. Please only reply if your message contains the solution (Terms and Conditions p. 12.1).

#1 Jak prześledzić ścieżkę na płycie bez oznaczeń


by matrixmm 22 August 2014, 09:40
Mam pytanie do doświadczonych kolegów.
Próbuję prześledzić przebieg ścieżki na płycie. Zdiagnozowałem zwarcie na płycie i wygląda na to, że zwarcie robi któryś z kondensatorów.
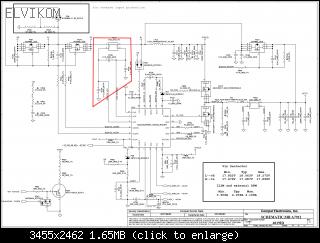
Na schemacie domyślam się który to, jednak na płycie ani kondensatory ani rezystory nie są oznaczone.
Próbuję prześledzić przebieg ścieżek po płycie i tu znowu brak mi doświadczenia jak czytać ścieżki na płycie.
Poniżej foto. Linią czerwoną i zieloną zaznaczyłem skąd dokąd uważam, że idą ścieżki od nogi 1 i 2 układu PU4. Domniemam, że kondensator do którego dochodzi zielona linia to PC30 (tylko którędy miałby się łączyć z PC26, Teraz myślę, że kawałek wyżej pod PU4). Jednak na przyszłość chętnie bym się dowiedział jak zidentyfikować dokąd idzie jego druga noga. Od kropki po obu stronach płyty nie ma żadnej ścieżki. Kondensator do którego idzie czerwona kreska to w/g mnie PC26. Pytanie jak stwierdzić który to i który to ten drugi (PC28 lub PC26). Czy jest jakaś prawidłowość w przelotkach ścieżek na drugą stronę płyty?
Jak zwykle wdzięczny będę za wszelkie porady.

Image

Image

Re: Jak prześledzić ścieżkę na płycie bez oznaczeń


by Google Adsense [BOT] 22 August 2014, 09:40

#3 Re: Jak prześledzić ścieżkę na płycie bez oznaczeń


by matrixmm 22 August 2014, 10:21
I'm searching the web for BOARD VIEW, but not found any where :( even pay site :(

#5 Re: Jak prześledzić ścieżkę na płycie bez oznaczeń


by 2informaticos 22 August 2014, 16:19
You don't need boardview to trace a short on B+ line, especially on this board.
It is plenty with small coils which allows you to separate B+ line.
More better, they are marked on the board, look at PL26 as example...
PC316/318 (bigger ones) are close to it, near PQ46.
On the left is PC321 (the samll one), which you don't need to check; it resists to 50V.
All the 10uF/25V from the board are same size as PC316/318 and they are placed close to any MOSFETs pair from secondary supplies.
Some of them will be on the opposite side.

If you work in a motherboard without small coils, or pads, that could help you separate the main power rail, is still not very dificult.
Is the case of Sony, for example.
You can easy locate the 4.7-10-22uF/25V, which are most usual values.
All must have same, or very similar size, like these from LA-7912...
Then you can remove 4-6-8 at a time with the hot gun.
My advise, always add leaded solder, before remove anything with hot gun from the board.
If the short dissapear, (at least) one of them is bad.
If the short persists on the board, continue with the others remained on it.
However check the ones removed already, one by one. I saw cases with 2 bad capacitors in a power rail; not in the main one.

In a power rail you will find many capacitors. But always discard the ones with bigger nominal voltage.
These can only fail by corrosion. If you will find one of them shorted, that will be allien job done there :mrgreen:
Fix your eyes in the ones with lowest nominal voltage. They will die before any others.

#6 Re: Jak prześledzić ścieżkę na płycie bez oznaczeń


by Vogelek23 22 August 2014, 19:30
Podstawowe pytanie - czy zapoznałeś się z działem SZKOLENIA? Jeśli nie, to proszę tam się udać i przeczytać, zwłaszcza Szkolenie nr 1. Bez tego nie ma mowy o dalszej dyskusji.

#7 Re: Jak prześledzić ścieżkę na płycie bez oznaczeń


by matrixmm 22 August 2014, 20:17
Jak najbardziej się zapoznałem. Zresztą zaglądam tam wielokrotnie jak siadam do szukania zwarcia. Bardzo dziękuję za to szkolenie. Bardzo wiele mi to wyjaśniło. Jak dla mnie początkującego jest to naprawdę duża pomoc. Jednak tym razem nie chciałem robić próby zwarciowej (rozumiem, że to powinienem) a chciałem się nauczyć jak śledzić drogę po ścieżkach. Zdobyć doświadczenie jak zobaczyć gdzie co się rozchodzi. Być może to bez sensu :) taki miałem pomysł. Jednak wyjaśnienie kolegi 2informaticos'a wiele mi rozjaśniło.

#8 Re: Jak prześledzić ścieżkę na płycie bez oznaczeń


by Vogelek23 23 August 2014, 09:29
matrixmm wrote:a chciałem się nauczyć jak śledzić drogę po ścieżkach.
Takie śledzenie po ścieżkach miałoby sens, gdyby laminat był, powiedzmy, dwuwarstwowy. Ale nie w przypadku płyt 4-8 warstwowych. Namierzenie zwartego elementu, który znajduje się w głównej gałęzi zasilania (najczęściej kondensatora) jest w zasadzie niemożliwe bez próby zwarciowej, zwłaszcza jeśli na płycie nie ma oznaczeń - często bowiem w tej gałęzi znajdują się elementy w skrajnie różnych obudowach (0402, 1206), "rozsiane" na całej płycie i po obu jej stronach. Dotyczy to zresztą nie tylko głównej gałęzi zasilania.

Moja skromna sugestia jest taka, abyś "nie wyważał otwartych drzwi" - w Szkoleniu podane są najprostsze i najbardziej efektywne sposoby diagnostyki czy namierzania zwarć, toteż wymyślanie innych sposobów mija się z celem. Gdyby metoda "śledzenia po ścieżkach" była łatwa w wykonaniu i efektywna, na pewno byłaby tam już dawno opisana.

This topic is marked as ARCHIVAL. Please only reply if your message contains the solution (Terms and Conditions p. 12.1).

Who is online

Users browsing this forum: Google [Bot] and 3 guests

_______________________________
All rights reserved. Unauthorised copying of this website's content or any of its part is strictly forbidden.
Any trademarks, brand names, products or services published on this website belong to their legal owners, are copyrighted and used for information purposes only.